# Get Orders from ERP
In this section, we will set up an ERP simulator so we can call our web service endpoint `sendMO` with a payload containing production order information.
Click to view example payload from ERP
```json
{
"metaData": {
"machineSetpoints": [
1,
2,
3,
4,
5
]
},
"order": {
"orderType": "PRODUCTION",
"notes": "",
"updatedBy": null,
"assetGroupName": "BATCH",
"scheduleInfo": {
"rateInfo": {
"period": "hour",
"equipmentRate": 400,
"budgetRate": 0
},
"enabled": true,
"assetName": "260410AP01",
"startDate": "2026-05-14 19:30"
},
"dueDate": "2026-05-31",
"lotNumber": "",
"itemClassPath": "Training\\260410\\FG",
"itemName": "FG-CP-2024-STD-250",
"uom": "Boxes",
"createdBy": "erp",
"itemPath": "Training\\260410\\FG\\FG-CP-2024-STD-250",
"orderQty": 500,
"itemDescription": "250ct 2024 Standard Coated Coupling Pins",
"manufacturingOrder": "ERP-Test-012",
"status": "Released"
}
}
```
::::action[Install the ERP simulator project]
Normally the ERP would be on a different machine, but we will install the ERP simulator on the same gateway. It still makes web service calls; they just go to the same machine.
1. download the following resources.
:::download[ERP simulator files]
- kanoaERPSim_project.zip: an Ignition project that plays the part of the customer's ERP system.
- erpSim-tags.json: the tags the simulator uses for its messages and its list of MES servers.
:::
2. On the Gateway web page, go to **Config → Projects** and import `kanoaERPSim_project.zip` (downloaded above). Name the project exactly `kanoaERPSim`, because the project name is part of the simulator's own web service URLs.
3. In the Ignition Designer, import `erpSim-tags.json` at the root of the `Kanoa` tag provider. This creates an `erpSim` folder with three tags: `message`, `woUpdate`, and `MES Server List`.
4. On the Gateway web page, go to **Home → View Projects** and open `Kanoa ERP Simulator`.
:::info
The erp simulator is defaulted to call the endpoint `/system/webdev/KANOA_SCRIPTS_/api/sendMO` at `http://localhost:8088`.
If your gateway name is different or you have created the endpoint in a different project or with a different name. You can change it by double-clicking in the table and setting it.
Copy your actual endpoint
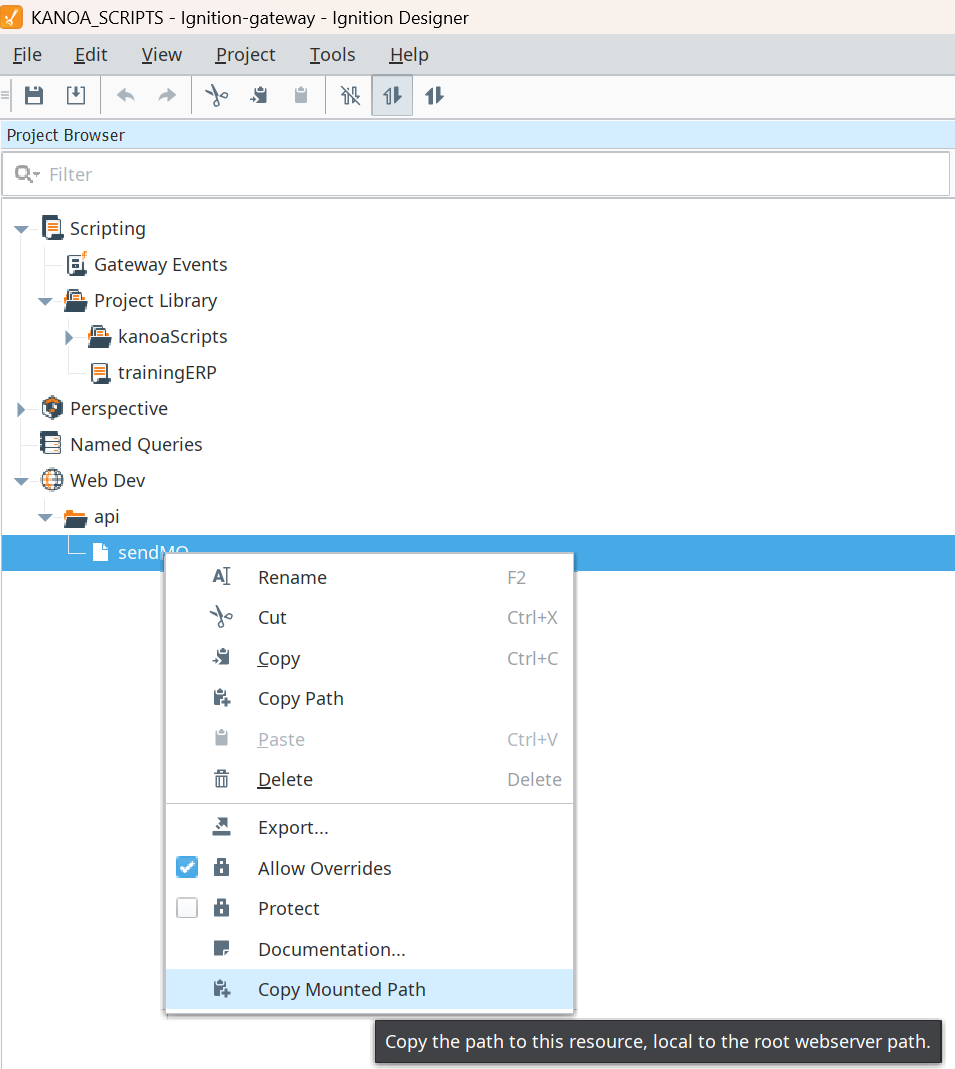
You can copy your actual endpoint by right clicking on your endpoint under WebDev in the KANOA_SCRIPTS project.
:::
::::
::::action[Test the ERP order import]
1. Create a new production order i.e. `PO#1234` and click `Send to MES` from the ERP simulator project.
Verify that:
1. The WebDev endpoint receives the request.
2. The script returns a success response.
3. Navigate to **Ops → Scheduling → Production Orders** and verify the production order is there.
:::info[If the order does not appear]
- Check the Gateway logs for errors
- Confirm the WebDev resource is enabled and the endpoint path is correct
- Confirm the request uses POST
- Confirm the script library name matches the WebDev call
- Confirm the order status is `Released`
:::
::::
We'll now extend this so that production orders received from ERP are not only created, but also scheduled.
:::action[Add an erpName custom attribute to Manual Pack 1]
ERP asset naming may be wholly different from what you end up calling your assets in MES. We recommend naming the assets exactly how operations knows them.
We can use asset custom attributes to link them together.
1. Navigate to **Configuration → Ops → Assets**.
2. Select `Manual Pack 1`.
3. Add a custom attribute named `erpName`.
4. Set its value to `AP01`. This is the ERP asset name you'll send in the `scheduleInfo.assetName` field of the payload.
:::
:::action[Test ERP-driven scheduling]
1. Send a new order from the simulator with the scheduled asset set to `AP01` and confirm the order is created or updated.
2. Navigate to **Ops → Scheduling → Operations**, select `Manual Pack 1`, and confirm the schedule block was created.
3. Send an updated payload and confirm the schedule block updated.
4. Send a closed-order payload and confirm future schedule blocks are removed.
:::
:::check
Copy this script into the Ignition Designer Script Console (**Tools → Script Console**) and run it with the `KANOA_SCRIPTS` project open. It checks:
- The `erpSim` tags exist, and the MES Server List has an enabled server the gateway can reach.
- The `kanoaERPSim` project is installed.
- The `trainingERP` library has all of its functions.
- The `sendMO` endpoint answers and calls `trainingERP.sendMO`. It posts an empty order, which `sendMO` rejects without changing anything. The script runs on your computer, so if it can't reach the gateway's web server from there (for example, a gateway in Docker), it skips this test and relies on the next one.
- `Manual Pack 1` has `erpName = AP01`.
- At least one ERP order arrived and is scheduled on `Manual Pack 1`.
Each check prints PASS or FAIL with what to fix.
Show the check script
::check-script{src="ops/03-erp-connectivity/2-scheduling-orders-from-erp.py" title="checkLesson-erpOrders.py"}
:::