Navigation
The navigation options available to a user can be modified through the application in the navigation configuration screen. This provides the ability to weave your custom screens in alongside the provided kanoa screens, to create a seamless application.
To create a new navigation item under an existing one, click anywhere in the navigation tree and select the ![]() button.
To create a new item at the root level, simply click the
button.
To create a new item at the root level, simply click the ![]() button without selecting a parent.
button without selecting a parent.
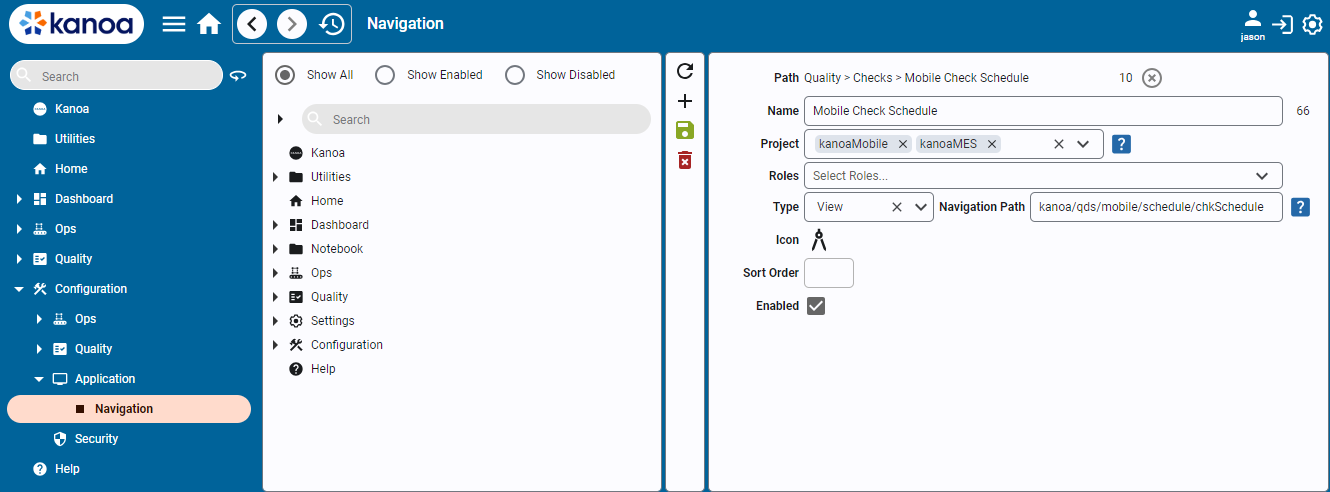
- Path: Informational. Displays the path and parentId. The parent can be cleared to place the navigation item at the root.
- Name: Add a name for the menu item that will be shown in the navigation tree.
- Project: Specify one or more runnable projects for which the item will appear. Leave blank to make it available to all projects.
- Roles: Add specific user roles required for the menu item to be visible.
- Type: Link the item to a view or page created in the Designer, or to a URL.
- Icon: Add a custom icon for this item.
- Sort Order: Define the order in which the item appears in the tree.
- Enabled: Enable or disable the item to show or hide it from the navigation.
Click the ![]() to save your changes before doing any other edits.
to save your changes before doing any other edits.
Click the ![]() to delete a navigation item.
to delete a navigation item.
Navigation items can be rearranged by dragging them to different positions in the tree.