Items and Parts
When the plant starts making something new, Kanoa needs to know the item and how fast each machine makes it. This lesson shows you how to add an item, link it to an asset with a rate, and add a part to the parts catalog.
Adding and editing items needs the Configure Items security function. Kanoa calls materials items.
Add an Item
- Open Configuration → Ops → Materials.
- Click the add button.
- Choose the Item Class, which works like a folder, and enter a unique Item Name.
- Add a Description if you want one, and leave Enabled ticked.
- Save.

For example, CoreForge could add a finished-good item named SC-2024-STD-100 in the class CoreForge\FG.
A disabled item can't be selected. An item used in past production runs can't be deleted. Kanoa disables it instead.
Reference Materials: Configuring Items - The fields on the item editor.
Configuring Items
Items can be added by clicking on the  button or edited by selecting an item and pressing the
 button.
Delete an item by clicking on the
 button.
💡 Note: Items that have been used in historical production runs cannot be deleted but will be disabled.
- Item Class: Select the Item Class this item belongs to.
- Item Name: Enter the item name. Item names must be unique.
- Description: Add an optional description about this item.
- Enabled: Indicates if the item is enabled. Disabled items cannot be selected.
- Color: Select a color for this item. Color coding can be useful when scheduling like products together because it can reduce the changeover time between production runs. If no color is selected, the item class color will be shown.
Link the Item to an Asset and Set Its Rate
An item can only be run on an asset once you link them. The rate tells Kanoa how fast the asset should run it.
- On the Materials screen, open the Production Rates tab.
- Click the link button to open the Item Asset Link Editor.
- Select the asset, such as Manual Pack 1, and the item. Check the output option, because the item is a product the asset makes.
- Select the new rate in the table and click the edit button.
- Enter the Standard Rate, Scheduled Rate, Period and Units, and save.

- Standard Rate is the speed the asset should reach. It drives the OEE performance figure.
- Scheduled Rate is the speed you expect in practice. Kanoa uses it to estimate how long an order takes.
- Package Count is how many infeed units make one outfeed unit.
For CoreForge, Manual Pack 1 might run SC-2024-STD-100 at a standard rate of 60 and a scheduled rate of 50 per
Minute, with a package count of 100.
If you select several rates, you can change one field, such as Standard Rate, for all of them at once.
Reference Materials: Production Rates - Link items to assets and set their rates.
The Production Rates tab provides a method for linking which items (products) can be produced on which assets. The Item asset linker popup provides a fast way to link multiple assets with multiple items.
Once you have linked which items can be produced on which assets, you can then edit the production rate information that defines how we determine if an asset is under or over-performing in terms of OEE Performance.
To edit one or more item product rates, click the button.
If you have selected multiple items, you can affect just one field value, such as Std Rate, without affecting any of the other item fields.
This is useful for performing a bulk update to standard rates or units.
- Standard Rate: The theoretical or expected speed at which the asset should process material. It uses the infeed units.

In the above example, Bake Line 2 is expected to be able to process 60lbs per hour of the infeed material to make Rye Bread. The Standard Rate drives the OEE Performance calculation and should not be affected by any scrap generated which is why it is measured against lbs processed and not loaves produced.
Sometimes the standard rate set for an item running on an asset may be affected by other external factors such as crew size, inclement weather, moisture content of incoming material. To handle this, the standard rate can be modified and set at the time the asset is in production through the system.kanoa.event.assetOperationChange() system function.
- Scheduled Rate: The expected asset rate to process material based on historical OEE data.
In the example above, we would actually expect to process 40lbs per hour due to data supporting the average amount of downtime and scrap generated when running this product on this line. Schedule Rate is used whenever a production order is added to the schedule to automatically determine how long we estimate it will take to complete a production order.
- Period: The timeframe for the rate. Can be 'Minute' or 'Hour'. For batch processes where the process time is independent of quantity, such as a chemical reaction time, use 'TOTAL TIME'.
- Units: Units designation for infeed, outfeed, and waste.
- Package Count: The number of infeed units that equate to the outfeed units. Used to calculate OEE values when no infeed count exists.
Rates for a tool
On a machine that uses tooling, a run's standard rate usually comes from the mounted tool: its cycle rate times its parts per cycle (see Cycle Rates and Item Rates). When an item runs at a different speed with a particular tool, give it a rate for that tool here. Tool rates are listed under the machine's own rate for the item, with the tool in the Tool column; the machine's own rate says Machine rate there. The Tool column only shows when a listed machine uses tooling.
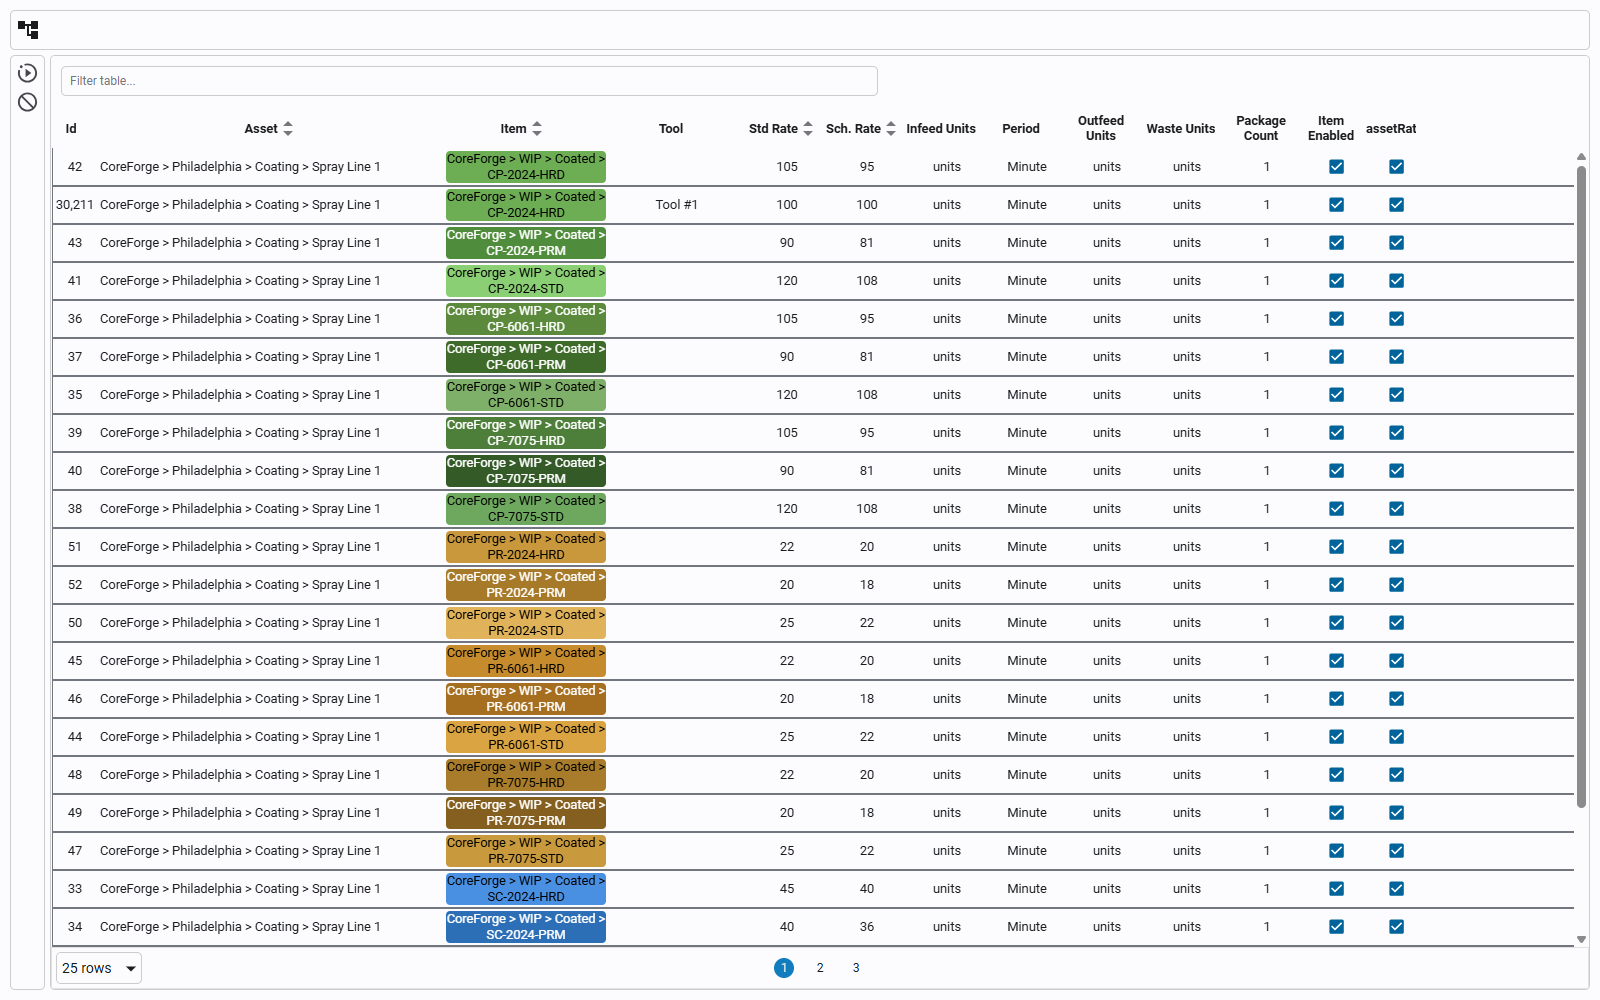
To add one:
- Select the machine's rate for the item (its Tool column says Machine rate) and click the edit button.
- In the editor, pick the Tool. The list has the tools that can be mounted on the machine, and None, the machine's own rate; a tool that already has a rate says (has a rate), and picking it edits that rate. A tool with no rate starts a new one from the machine's rate's units and period, and a hint says what the tool's cycle rate already gives the item, so you can tell whether you need a rate here at all.
- Enter the standard rate (and schedule rate) and click Save.
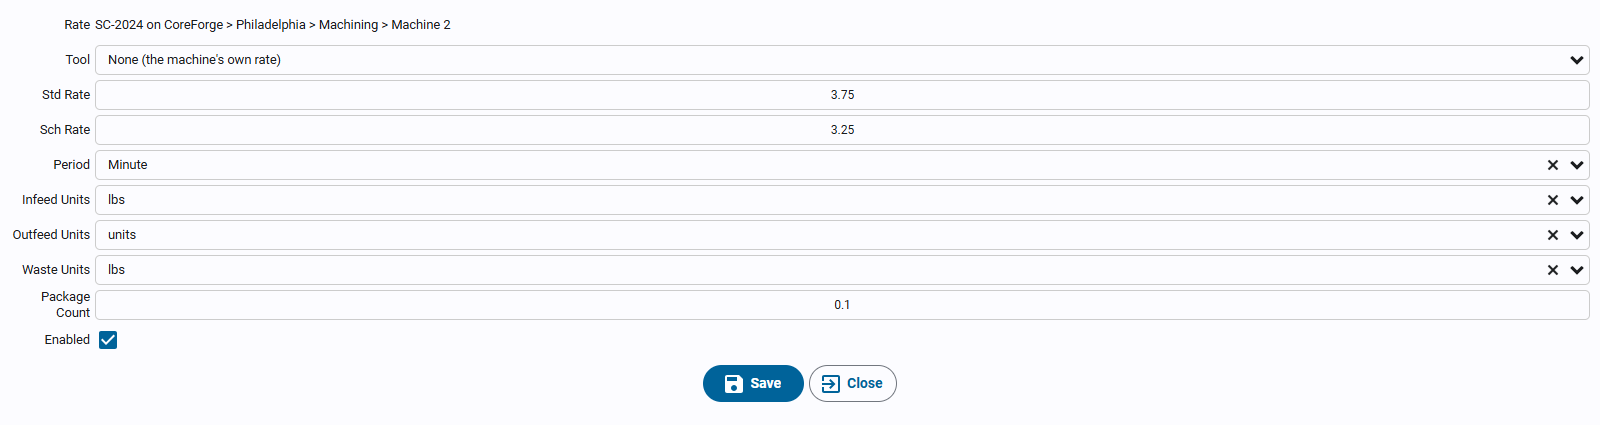
A tool rate is only for the machines in the tool's site, and only for machines that use tooling.
Add a Part to the Parts Catalog
This section needs Kanoa Inventory, which is licensed separately, and applies only if Enable Kanoa Inventory is on (see the track overview). Without a license, Kanoa Inventory only runs in trial mode.
- Open Inventory → Parts.
- Click Add (or the + button) to open the Part Editor.
- Enter the Part #, Category, Description, Manufacturer and Default UOM.
- Tick the flags that apply, such as Is Critical or Is Consumable.
- Click Save.
If the manufacturer or unit of measure isn't in the lists, add it first in Configuration → Inventory. To retire a part without deleting it, untick Enabled.
Check Your Understanding
- Which function do you need to add an item?
- You've added an item. What else must you do before an asset can run it?
- What does the Standard Rate drive?
Answers
- Configure Items.
- Link the item to the asset on the Production Rates tab and set its rate.
- The OEE performance calculation.