Execute a Work Order
A work order is more than a to-do. Every status change is recorded with a time, and the time you spend is added to the
plant's labor figures. This lesson takes one work order from start to finish, such as the Machine 1 - Coolant leak
work order, if it has been created: the Maintenance Manager track raises it in
Raise a One-Time Work Order.
Start the Work
- In Maintenance → Work Orders, open the work order assigned to you.
- Click In Progress in the row of status buttons at the bottom of the panel.
- Set Work Type to the kind of work you're doing, such as
Repair.
The status buttons are Open, Assigned, In Progress, On Hold, Completed and Cancelled. If the job can't go on, for example while you wait for a part, click On Hold instead of leaving it In Progress. On Hold counts as waiting, so the backlog shows the job as waiting and not being worked.
Follow the Procedure
If the work order has a procedure, it's on the Procedure tab. A procedure is a set of steps, and each step has checks.
- Open the Procedure tab. Each step is a button that shows how many checks it has, such as Chain Tension (3).
- Select a step, then work through its checks.
- Enter the Time Taken for the step, in minutes, next to its Estimated Time.
The Instructions tab holds the written instructions for the job. Read it before you start.
Reference Materials: Procedures - Steps, checks and how results are recorded.
Maintenance procedures define the step-by-step instructions technicians follow when executing maintenance work. Once a procedure has been defined, it can then be attached to a maintenance work order.
A procedure is composed of:
- General Information (name, category, description)
- Steps (high-level phases of work)
- Checks (detailed verification tasks within each step)
- Entry Options (how technicians record results)
- Images (visual references)
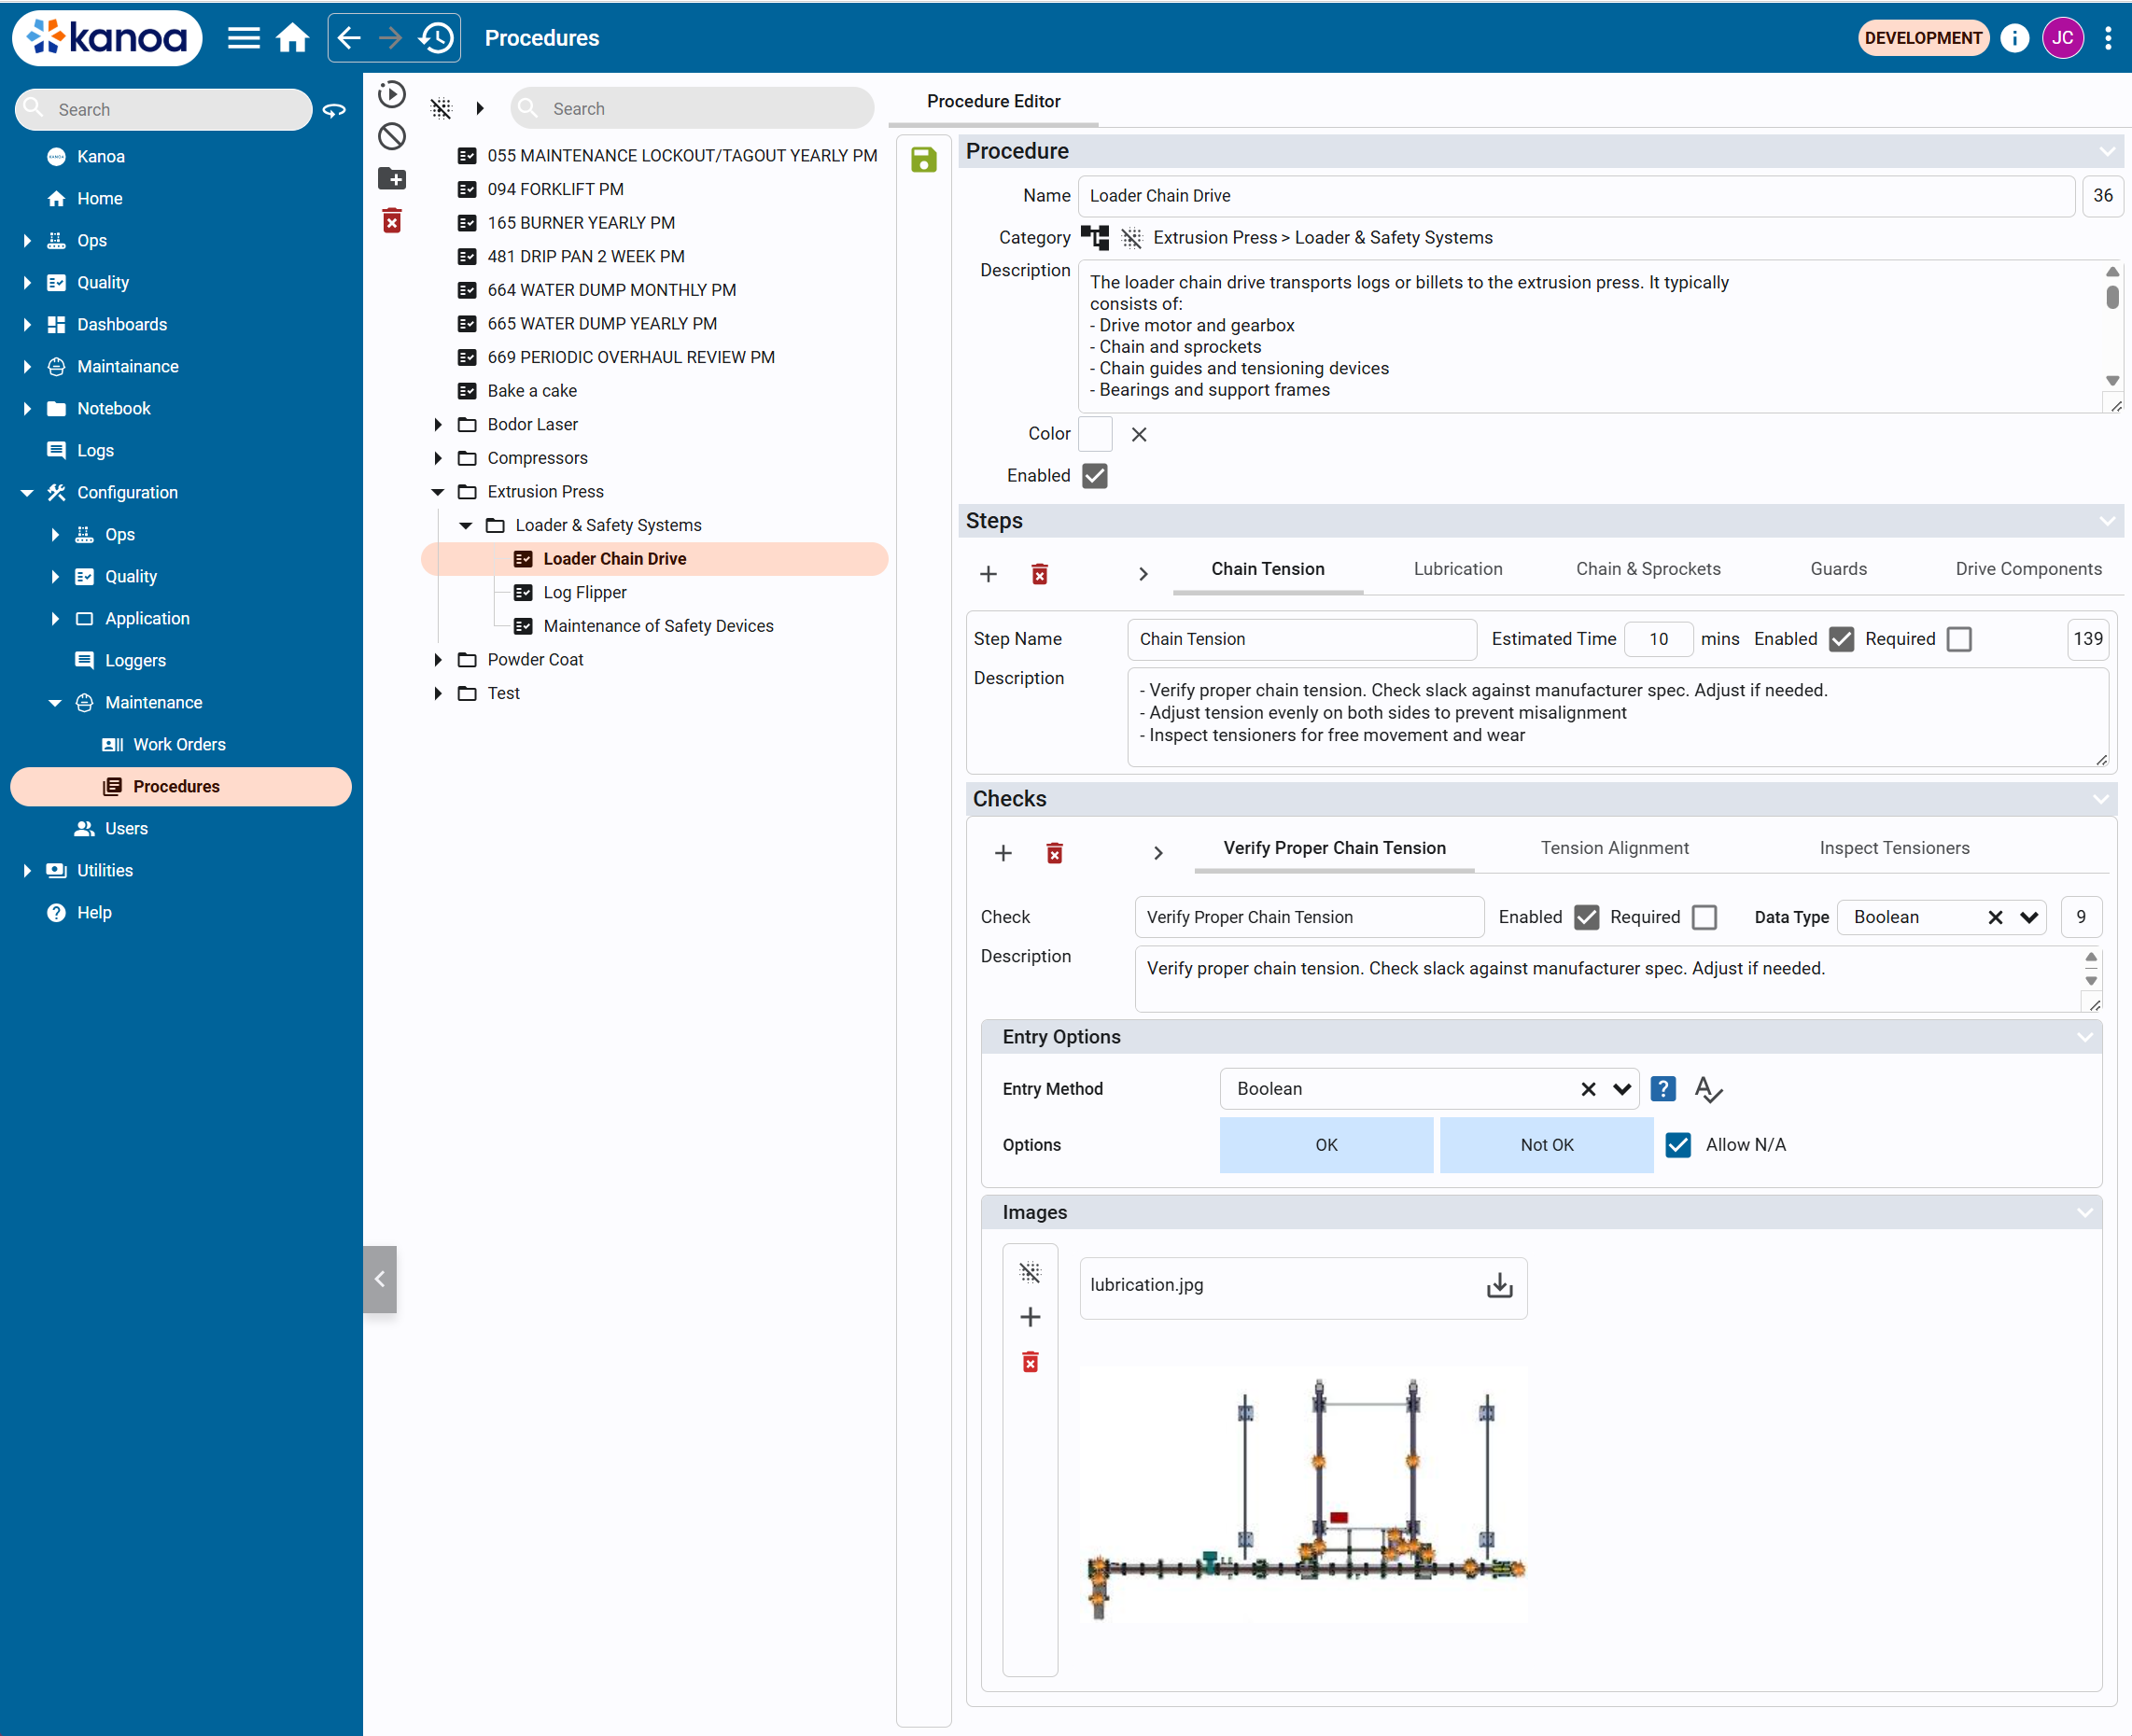
The general workflow is that:
- User defines a procedure
- Procedure is attached to a work order template
- Work orders are generated from the template
- Technicians execute the procedure step-by-step
- Results are recorded through checks
Steps
Steps represent the major phases of a procedure. Each step includes:
- Step Name (e.g., Chain Tension)
- Estimated Time (in minutes)
- Enabled / Required flags
- Description
Steps are typically sequential and guide the technician through the overall workflow.
Checks
Checks are detailed tasks or validations within each step.
They define exactly what the technician must verify or perform.
Each check includes:
- Check Name
- Description
- Enabled / Required flags
- Data Type (how results are captured)
- Entry Options define how the technician records the result of a check.
- Images can be attached to a check to provide visual guidance, reference diagrams and/or inspection points.
Record Your Labor
Each work order event has a Technicians list. Add one entry for each person who worked on it:
- Technician: the person who did the work.
- Work Type: the kind of work, such as Repair or Inspection.
- Duration: how long they worked, in minutes.
If two people work one job, each logs their own time. If you did two kinds of work, add an entry for each.
Close the Work Order
- Open the Comments tab and add a comment about what you did, such as the part you replaced.
- Click Completed at the bottom of the panel.
- Open the History tab to see each status change and who made it.
Kanoa uses these times for its maintenance measures. The time from creation to the first response measures how fast work is picked up. The time from In Progress to Completed measures how fast it's done.
Click Cancelled only for a job that won't be done. A cancelled work order isn't a completed one.
Check Your Understanding
- A job is waiting on a part. Which status do you set, and why not leave it In Progress?
- Two people fixed a machine together. How is each person's time recorded?
- How do you check who changed a work order's status?
Answers
- On Hold. It counts as waiting, so the backlog shows the job as waiting and not being worked.
- Each person has their own entry in the Technicians list, with their work type and minutes.
- Open the work order's History tab.